If you've ever had the unpleasant experience of seeing images you worked so hard to create somewhere else on the web, you'll understand the importance of learning how to watermark them. Things can get ugly when other websites pass off your images as their own creation. Why get into such situations when you can avoid them by simply watermarking your stuff.
Okay, let's get started. There are two ways you can do this.


Okay, let's get started. There are two ways you can do this.
- Using Paint
- Using GIMP
- Select the image you want to watermark. Right click on it. Open With -> Paint.
- The image opens in Paint

3. Next type in the text.

4. The letters for the watermarking have been typed in. But there are problems. They are too tiny and you are not too pleased with the colour. How do we change that? Let's go back and take a look.

5. The screenshot below shows the adjusted text box.

6. Let's change the black to something that looks more like a watermark. I chose grey.

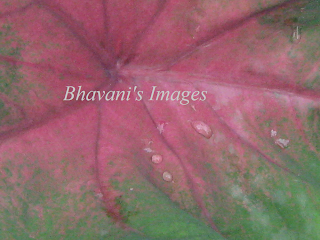
Here's my final watermarked image.

Looks good but does not look like a real watermark does it? To look like a real watermark,the letters need to have a translucent quality. I haven't discovered a way to do it in Paint yet. Maybe there isn't one. But you can do it with GIMP. I'll take you through the steps in my next post.
There's one other aspect to watermarking that Paint lacks. Rotation. You can't place the watermark diagonally across the image using Paint.
No comments:
Post a Comment